Replace the Pump and Capping Station on Anajet Sprint
customer
Buy the Anajet Pump and Capping Station
Watch a video on Removing the Anajet Sprint Pump and Capping Station
Watch a Video on Installing the Anajet Sprint Pump and Capping Station
Removing the Control Panel
The LCD is very static sensitive, use antistatic protective equipment.
Remove the two Phillips (+) screws that hold the Control Panel to the printer body.
These are accessed from a rectangular hole located beneath the printer.

- Remove the ribbon cable from the LCD.
- Remove the 2 pin connector from the LCD backlight cable.
- Remove the flat flex cable from the Control panel cable.
- Disconnect the 2-2pin ground cables from the Control Panel
- Unscrew the green and white leads from the Print Button Assembly
- Unscrew the two green ground leads from the front body panel screw.
- Reassemble the new Control Panel by reversing the above steps.
- Adjust the backlight and character contrast if required
Ink Delivery System Removal
- Remove the Ink Cartridges.
- Remove Front Body Panel by removing the single front retaining screws and two rear screws securing the front body panel.

- Remove the Bezel
- Remove the fixed end of the Tube Carrier from the Tube Carrier Bracket.

- Remove the Dampers from the Carriage and Place the Dampers in a plastic sandwich bag above the level of the Print Head to minimize leakage from the Dampers.
- Unplug the cables to J 1 and J 2 from the Ink LED PCBA and the connector labeled PIN1

- Remove the four 6-32 screws from the lower support of the Ink Delivery System.

- Remove the 6-32 screw from the upper bracket of the Ink Delivery System.

- Slide the Ink Delivery System forward and out of the Main Chassis.
- Reassemble the Ink Delivery System by reversing the removal steps.
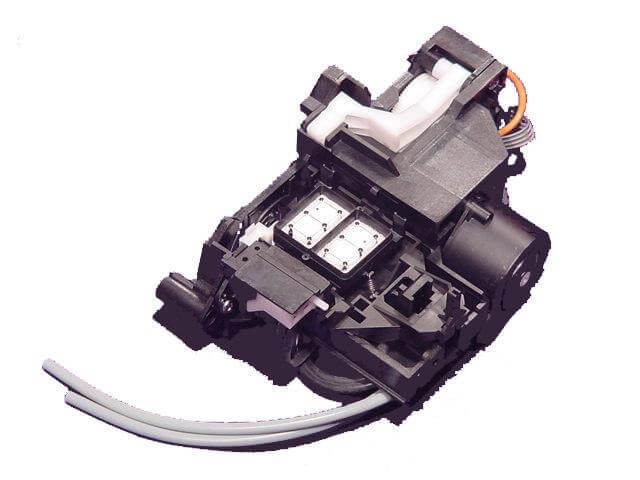
Maintenance Station
- Remove the Waste Ink Tank.
- Release the print head Carriage and move it to the left, away from the Maintenance Stationl.

- Remove screws labeled A1 and A2 in the photo below and loosen the screw labeled A3

- The last remaining screws holding the maintenance station in are shown in the images below.


- The last step is to simply remove the maintenance station. Rotate the maintenance station front end down and then slide it out from underneath.

- Install the new Maintenance Station by reversing the above steps.