

Using the Large Table on the Melco G3
Paul Boody
Tools needed for installation:
- 2.5mm Metric Hex Driver
- 3mm Metric Hex Driver
Needed Parts:
- T-Shirt Table, Large
- Four (4) M4 Countersunk Hex Screws
Installation Instructions
- Remove the Standard Frame Table from the machine.
- Loosen and remove the hardware – 4 screws – at each corner of the table using the 3mm Metric Hex Driver.
- Remove the Standard Frame Table and store it in a secure location.
- Loosen and remove the hardware – 4 screws – at each corner of the table using the 3mm Metric Hex Driver.
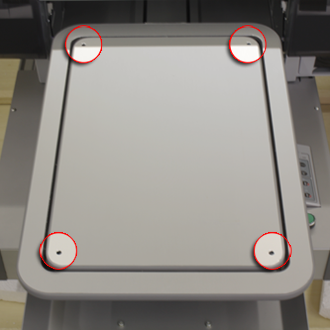
- Align the Large T-Shirt Table as shown in the picture below and secure it to the Table Support using four (4) M4 Countersunk Hex Screws.

Related Products

