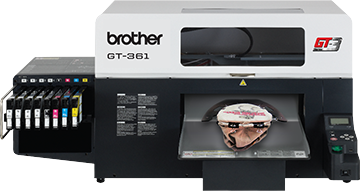
Brother GT-381 GT-361 GT-341 Cover Removal
Dean Armando
Removing the Rear Cover
(1) With the power on, eject the platen so it not partially in the rear cover.

(2) Power off the machine and remove the power cord from the back of the printer.
(3) Use a long Phillips Screwdriver to remove teh single Phillips screw on the underside of the cover.
(4) Lift the cover upward so it slides off of the mounting brackets.

Back Cover Removal
Remove the Rear Cover (see Rear Cover Removal Guide for assistance)
(1) The platen should be ejected and the power off.
(2) Remove the power cord from the back of the printer if it is connected.
(3) Remove the USB cable and Ethernet cable if it is attached.

(4) Remove the four screws along the bottom of the cover.
(5) Remove the four screws along the top edge of the cover but hold on to the cover as you remove the last screw so it does not fall.
(6) Lift the cover from the back of the machine; be careful not to pull the waste ink tube as you lift the cover from the machine.
Note: only the Rear Cover and Cables need to be removed for the Back Cover to be removed.
Right Side Cover Removal
Access to the Main PCB
Power off the machine and remove the power cord (note, if a circuit board is to be removed or inspected, the power MUST be reconnected for the required grounding strap to access ground)
(1) Open the top cover (if in place), and remove the right most Black Phillips Screw from the part of the right side cover that wraps around to the front side.
(2) Remove the Silver Phillips Screw that it located under the Panel Assembly.

(3) Remove the Four Silver Phillips Screws from the side cover and lift the cover from the machine.

Removing the Top Covers (both parts together)
(1) Power off the machine and unplug the power cord from the back of the printer.
(2) Open the front lid to the point that it locks in the open position.
(3) Loosen the screw on each side but do not remove them; they will be removed last.
(4) Remove the four screws along the bottom in the back of the cover.
(5) Remove one of the two side screws and be careful not to let the cover slip.
(6) You will likely need the help of someone to perform this last step; remove the last side screw and lift the cover holding both covers together and set the cover aside.

Note: Please do not attempt to remove this cover alone; help will likely be necessary to lift the cover assembly to avoid injury.
Front and Platen Base Cover Removal
These are two individual parts but should be removed as one part.
(1) Eject the Platen and loosen the platen locking screw and remove the platen from the base.

(2) Remove the Black platen height adjustment lever by removing the silver screw that blocks the lever from being removed. Thread the screw back into place for safe keeping.
(3) Remove the six Phillips screws from the platen tray and lift the tray from the tray rails.

(4) Lift the top cover if it is still in place (the top cover does not have to be removed in order to remove the front cover and platen base cover).
(5) Remove the three black Phillip Screws from the top edge of the front cover.
(6) Remove the four silver Phillips Screws along the bottom of the front cover. One of the four screws is on the left side.
(7) Remove the two black Phillips Screws on the left and right side inside the platen tray bay.
(8) Remove the four screws on the Platen Base cover; two on each side.

(9) Grab both sides of the Platen Base Cover and pull outward from the front of the printer. The front cover should slide forward with the platen base cover. You may have to pull the front cover slightly so it pulls away from the printer with the Platen Base Cover. There are four tabs that keep these two covers connected. Try to keep the covers as one piece. The reassembly will be much easier if these two parts are still connected. Set the covers aside in a place where they will not be disturbed (separated).


