Carriage Encoder Adjustment
customer
2.4 - Carriage Encoder Adjustment
Tools Needed
- 5/32 Allen Key
If excessive abrasion occurs or if the Carriage Encoder is replaced, you will want to check the position of the encoder. If adjustments are needed follow the steps below.
(1) Begin by releasing the carriage (Menu > Maintenance Functions > Print Carriage Control > Release Carriage). Once the Carriage has been released, move the carriage to the far left. Observe the position of the encoder strip, the encoder strip should be going directly down the middle of the encoder sensor. The encoder should not be touching or leaning toward one side. Move the Carriage to the far right now and check the position of the encoder strip on the far right side.
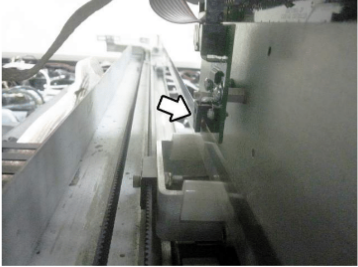
(2) If adjustments are needed, loosen the two socket head screws holding the left encoder mount and adjust until centered. Retighten the Screws. See photo 2.4.2

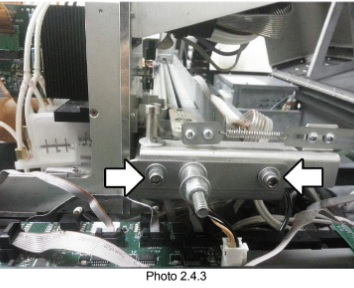
(3) Now that we have adjusted the left hand side, move the carriage to the far right and check the encoder strip alignment on the right side. If the left side was adjusted its possible that the right side has moved and needs adjusting. If adjustment is necessary, loosen the two socket head screws and adjust the encoder until we have the correct position. See Photo 2.4.3.
(4) Once the encoder strip has been adjusted, secure the carriage back to its home position.