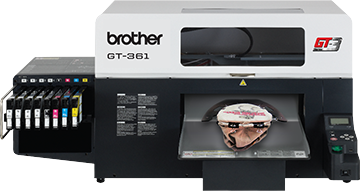
White Color Alignment on the Brother GT3
customer
This procedure is used as a possible remedy for misalignment issues with the CMYK ink not covering the white ink properly. A CR Origin Set may have to be performed if the results of this test are not satisfactory. If the printer was moved, even rolled across the room, the CR Origin may have to be reset. This could be the cause of alignment issues. Please view the CR Origin Set guide or contact Brother Technical Service for help with this procedure. Keep in mind that the appearance of white ink at the edges of a print may very likely be due to fabric shifting and/or anti-alias on the design. You should perform a nozzle check on CMYK and the White print heads and perform Head Cleanings as needed to ensure for a clear test print.
(1) Please have a dark color shirt pre-treated beforehand. To access the alignment program the printer must be powered on and not be in use. The printer must be connected to the PC that has the print driver installed via a USB 2.0 cable.
(2) Click on PC start button. Select program or all programs.

(3) Select the Brother GT-3 Tools and click on GT - Maintenance.

(4) Select the correct GT model #. If your printer is not listed in the drop down menu verify that your print is powered on and is connected to the PC via USB 2.0 cable. Under the GT-3 Maintenance menu, select White/Color Alignment then click next.

(5) Make sure your platen is set to the "A" position. Place your pre-treated dark color shirt onto the platen. Click the "Next" button and the Check Pattern test data will be sent to your printer.

(6) Confirm that the file "Align Check" appears on the LCD screen of your printer. When you see that, press the green print button on the printer. After printing click next.

(7) When you look at the printed pattern, determine which square has the black inc evenly covering the white ink. In the example below, the best square is X -4 and Y 2.

(8) The maintenance program will display a section for you to enter the data for the evenly covered square location; in this example, -4 & 2 will be entered.

(9) After entering the data and clicking "Next", the printer will echo a tone which means the data has been updated. Reposition the garment so a clear area can be printed upon and press the green print button. After the printing has finished, click the "Next" button.

(10) The desired print image is the center square evenly covering the white ink with black ink as displayed below.

(11) The Maintenance Screen display will have you confirm if 0, 0 is the best square. If it is, click "Yes" and then click the "Next" button. The procedure has been completed in this instance. If no, click on "No" and then click on the "Re-Adjust" box when it appears.

(12) If you have clicked on Re-Adjust, the following screen will appear:

(13) You will be repeating the previous steps until the center square (0, 0) has the evenly covered ink pattern. Once you are able to click on the "Yes" option and then "Next" after a print, the following will appear and you will be able to click OK.

You will then be able to click on "Close" on the bottom of the Maintenance menu to exit the menu.