
IMAGE ARMOR F-SERIES CONVERSION INSTRUCTIONS AND MAINTENANCE INFORMATION
customer2 comments
IMAGE ARMOR F-SERIES CONVERSION INSTRUCTIONS AND MAINTENANCE INFORMATION
The F-SERIES inks are designed to replace the OEM ink set for the Epson F-2000 Direct To Garment printer. These inks are designed with high performance capabilities, 35 second white ink cure time with as close a match to the original OEM inks as possible at a more affordable operating cost per cartridge. The cartridges are remanufactured cartridges, Made in the USA and are NOT manufactured by Epson. Each cartridge is 600mL in size.
A complete flushing of the white and CMYK ink lines is required. We DO NOT recommend inter-mixing Image Armor and OEM inks due to inter-compatibility issues. Only use Image Armor F-SERIES inks as a complete set (W1+W2+CMYK).
WHAT YOU WILL NEED:
- 6 Qty – Standard Epson F2000 Cleaning Cartridge - 700 ml
- FULL Set of Image Armor F-Series inks including:
- White 1 and a White 2 (Slot 1 / Slot 2)
- Cyan, Magenta, Yellow, and Black
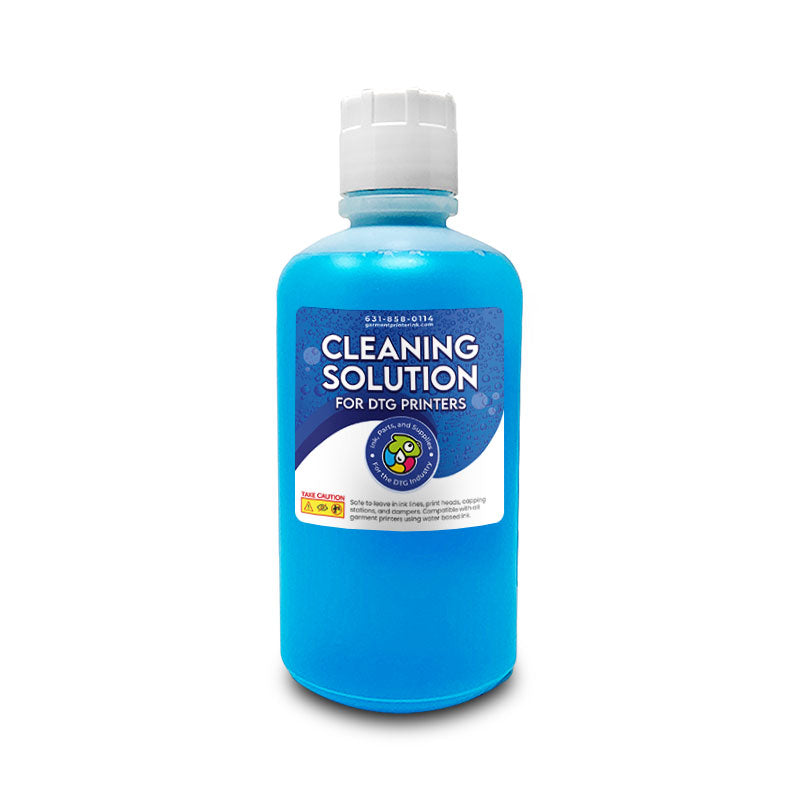
- Liter Bottle of GPI Cleaning Solution
- Bottle of GPI Capping Station Soak Conditioning Solution
- Syringe (which you should already have for ECO Tube Flushing)
STEP-BY-STEP-INSTRUCTIONS
1.TUBE FLUSH THE WHITE INK LINES

1.2.Scroll Down the MENU to REPLACE WHITE INK and press OK.

1.3.You will be instructed to open the left cover. Remove the OEM White ink cartridges .

Physically install the OEM Cleaning Carts and close the cover.

1.4. After closing the cover you will get a prompt to press the ‘OK’ button to start the cleaning process.. Press the OK button.
1.5. You will then be prompted showing it takes 14 minutes to flush the system of white ink.

Select YES and press the OK Button. The system will take 14 minutes to clean and flush out the white ink.
2. INSTALLING THE WHITE F-SERIES INKS
2.1. Make sure you have a W1 and W2 ink cartridges available. DO NOT INSERT THESE CARTRIDGES YET. You will be prompted to do this later. You CAN NOT have two W1 or W2 cartridges in the printer at the same time. You MUST have one each W1 and W2 for the system to work properly.

2.3.Scroll Down the MENU to REPLACE WHITE INK.

2.4.Press the RIGHT arrow button to select REPLACE WHITE INK
2.5.Scroll up to Select “YES” – Press the “OK” button.

2.6.Follow the on-screen instructions. Open Left Ink cover and replace the cleaning carts with the new Image Armor White INK cartridges. Remember YOU MUST HAVE one SLOT 1 and one SLOT 2 White inks to insert into the printer. You CAN NOT have two SLOT 1 or SLOT 2 cartridges or the printer will not allow you to load the new white into the printer.

2.7. After inserting the White ink cartridges and closing the left cover, you will be prompted that the inks are Non-genuine carts and may not perform at optimum. It will ask if you want to continue. Scroll up and select ACCEPT. Press the OK button to continue.

2.8.The machine will show a screen saying the entire change over process will take about 20 minutes. Scroll up to select YES, then press OK.

2.9. The printer will then flush out the CLEANING Solution and fill the printer with white ink. It will then do a “CLEANING” on the printheads.
After the printer is done you can perform a nozzle check to verify you have a good nozzle check for the white ink and all nozzles are firing. If needed, do a LIGHT Cleaning until all nozzles are firing correctly.
3. REPLACING THE OEM CMYK INKS WITH IMAGE ARMOR INKS.
3.1. This process will be extremely similar to the WHITE Tube Cleaning process described previously in Steps 1 and 2.
3.2. Press the RIGHT arrow button to access the main MENU. Scroll down to select MAINTENANCE. Press the RIGHT Arrow button to select.

3.3. Scroll down to TUBE WASHING. Press the RIGHT Arrow button to select.

3.4. Scroll down to select COLOR INK. Press RIGHT Arrow button to select.

3.5. When prompted that it will take about 43 minutes to perform this operation, scroll up to select YES. Press the OK button.

3.6. You will be prompted to open both of the ink cartridge covers. Remove the current OEM CMYK cartridges and insert the 4 new OEM CLEANING cartridges in the open slots.

3.7. Close the covers for the ink slots. You will be prompted to press OK to start.
3.8. Follow all instructions. If you get an EMPTY WASTE INK BOTTLE prompt, make sure you follow the instructions. You do not want to overflow your waste ink bottle.
3.9. When the printer is done with the CMYK TUBE WASH, follow the on-screen instructions.
3.10 Open the ink cartridge covers and insert the new Image Armor F- SERIES CMYK inks into the appropriate slots. Close the covers.
3.10. After closing the ink slot covers you will be prompted to press OK to continue. This will now fill the CMYK lines with the new inks.
3.11. When the printer is done, it will go back into standy-by mode. Complete a nozzle check to ensure that ALL nozzles are firing correctly.
ADDITIONAL TIPS ON CHANGING THE INKS OVER
• It is a good idea to do one or two LIGHT nozzle cleanings on all colors after switching inks.
• Always check your Waste Ink container. It can easily overflow – that’s messy and you don’t want that to happen.
• Always have a spare Head Cleaning Set on hand. If you go through a LOT of inks it is always a good idea to order ahead of time – saves you on expedited shipping and lost production times!
• It is a good idea to manually clean the print head face and around the print head after installing the new inks. Start off clean and fresh. At the same time, make sure to do the Eco-Clean.
REMOVE THE WASTE INK FILTER FROM THE LEFT SIDE OF THE MACHINE:
We recommend removing the Waste Ink Filter from the left side of the machine. The printer sits over this area and spits waste ink onto the filter. Remove the filter and see the Daily Maintenance to ensure continued good operations and cleaning of the Waste Ink area.

CHECKING TO ENSURE YOU ARE IN ECO-TUBE FLUSH MODE:
1. Press the RIGHT Arrow button to get into the main MENU.
2. Scroll down and select PRINTER SETUP. Press RIGHT ARROW button to select.
3. Scroll down and select TUBE WASHING SETUP. Press RIGHT ARROW button to select.
4. Scroll down and select ECO. Press OK to select.

5. Press the BACK (Left) Arrow button 3 times to get back to main screen.
IMPORTANT!!! It is EXTREMELY IMPORTANT to ensure you are in the daily ECO mode for Tube Flushing. You want to perform this DAILY using the GPI Cleaning Solution and Capping Station Solution to keep the suction cap and capping station clean.
_______________________________________________________________________
PRINTING & INK CURING WITH THE NEW F-SERIES INKS
Printing with your new F-SERIES inks will not be much different than printing with your original OEM inks. ENJOY PRINTING!
INK CURE TIMES: 356F / 180C Light pressure – 35 seconds. Slightly longer if the white ink is heavy or is very large areas of white ink.
DAILY MAINTENANCE REQUIRED
Daily maintenance to keep your system running properly is paramount to a successful DTG business. Follow these Maintenance Routines and Cleaning Points. Remember, your printer can not be too clean but it can be too dirty – a Clean Printer is a happy printer.
1. Do your ECO-TUBE FLUSH Daily. We like to start the day with a Tube Flush and Cleaning of the SUCTION CAP and capping station.
2. To do a manual TUBE WASHING do the following:
a. Press the RIGHT Arrow button to show the main MENU.
b. Scroll down and select MAINTENANCE. Press the RIGHT Arrow button to select.

c. Scroll down and select TUBE WASHING. Press the RIGHT Arrow button to select.

d. Select YES and press the OK button.

e. Follow the on-screen instructions. You will want to ensure that you completely clean the Suction Cap edges and inside with the GPI Cleaning Solution for direct to garment printers.

f. After the SUCTION CAP and capping station are clean, use 10cc of the GPI Cleaning Solution into a syringe and do a SUCTION CAP cleaning. DO NOT CLOSE THE LID WHEN DONE.

g. After ensuring that the Suction Cap is clean and all fluid is being sucked correctly, repeat Step F with 10cc of the GPI Capping Station Conditioning Solution. This will help keep the ink in the tube lines “wet” and resistant to drying out.
h. When done doing the TUBE WASHING two times with the GPI Cleaning Solution and GPI Capping Station Conditioning Solution, close the cover.
Related Products


Comments (2)
Do you carry the refillable ink carts for the Epson F2000/2100? I can’t seem to find them on your web page.
Thanks
Can i just replace the white ink and use the colors from epson until finish I just install the color cartrige